Final Product- Music Video

Monday 26 April 2010

Final Product- Music Video

This is an uploading of my final A2 Media Studies main product a
music video.


Note that my personal chosen record company is Island Records not Stiff Records
I DO NOT OWN THE RIGHTS TO THESE LYRICS

Thursday 22 April 2010

Evaluation: How did you use media technologies in the construction and research, planning and evaluation stages? Pt 5


The final media technology I used in the creation process of my media products and the technology I felt I used to my best ability was Abode Photoshop for my ancillary tasks. I used this successfully as I used different layers to create backgrounds, titles, pictures and foregrounds that linked with the music video and also the promotional package altogether as a whole marketing brand. The main tools I used to create my ancillary tasks on Photoshop were the Stamp tool and Brushes. I used the brushes effectively by changing the opacity and also changed the tolerance levels to some brushes. Another effect I used often when using Photoshop was the colour overlay- I used this with my main image and other brushes. To manipulate and edit my pictures I used the Magic tool and Quick Selection tools to take out anything I didn’t want in the pictures- after doing that I added colour overlays to them. I was able to create designs I used successfully throughout my ancillary tasks and completed the designs used for my overall marketing package.

Evaluation: How did you use media technologies in the construction and research, planning and evaluation stages? Pt 4

An online technology I used to plan, research, evaluate and record the process of my media products was the website ‘Blogger’. I felt I used this form of media technology worked effectively as I recorded every part of the creation process on there and I was able to use all the options available to me. I was able to upload videos from Youtube to my blog, upload pictures and screenshots to help illustrate my writing.

Tuesday 20 April 2010

Evaluation: How did you use media technologies in the construction and research, planning and evaluation stages? Pt 3

To produce the footage for my media product I used a digital camera. This was one of the most important technologies used as it was needed to capture and record all of our footage used in our music video. Alongside using the camera I used a tripod and FIG-RIG to create more interesting, visually appealing shots- I was using a media technology along with other forms of equipment to produce various different shots. I also used the media technology of a still camera- mainly in my ancillary task to take photos of my band members in different shot types and also merchandise materials.


Evaluation: How did you use media technologies in the construction and research, planning and evaluation stages? Pt 2

During the research and planning stages of my media product the main media technology I used was the Internet. I used Youtube to research into various music videos to analyse them and also used allcdcovers.com to download front CD covers and back covers to also analyse them to understand the conventions of the products.


Evaluation: How did you use media technologies in the construction and research, planning and evaluation stages? Pt 1

Media technologies played a significant part to the creation process of my media products. ‘Final Cut Express’ was an extremely important technology used when creating my music video. The effectiveness of this editing software allowed me to use a diverse range of effects such as colour corrector, mirror effect, strobe amongst others used in my media product. The programme also let me change the opacity levels and hue saturations of footage.


‘Final Cut Express’ allowed me to overlay footage so I could edit and cut the size of various clips easily and efficiently. The overlay of tracks meant I could constantly have the music track in, which helped with syncing the footage and saved time.

Thursday 15 April 2010

Evaluation: What have you learned from your audience feeback? Pt 4

Our audience feedback session made me aware that our target audience was shown through the video, as they personally felt we were targeting the correct audience through the use of bright colours and effects used. It also made me aware of the improvements needed to my music video at the time and what expectations my target audience have when viewing a music video.


Monday 12 April 2010

Evaluation: What have you learned from your audience feeback? Pt 3

A final positive point that the audience enjoyed in the music video was the use of Illustration and Amplification used. The footage was connected and told the story of the lyrics, our audience wanted to see more of this and we acted upon this re-shooting footage that linked to the lyrics.


Although we received positive feedback we also received constructive criticism from the session. The audience main point of feedback was on the image of the band and how we represent the band. They felt we didn’t have enough of the band interacting with the audience and performing to them. Although it was communicated to the audience who the band members were, they didn’t feel connected to the main singer and felt that the main singer wasn’t representing a conventional ‘popstar’. When asked about the name of the band ‘The Madettes’ and if the band’s representation and persona of being ‘Mad’ was portrayed, they felt it was in parts but not enough and we needed more of the ‘mad’ effect. We took on board this feedback and decided to re-shoot focusing on the above factors that our audience made aware to us.

The audience felt that the amount of footage we filmed in the recording studio and placed within our music video was too much and the audience constantly wanted more of something different. The audience enjoyed the instruments playing and the performance factor to our music video because it wasn’t ‘over-used’.

Evaluation: What have you learned from your audience feeback? Pt 2

We received some positive feedback about our main media product, for example the audience felt attracted to the changing of bright colours when the band were performing. They felt it complemented the pace of the music and overall feel to the song.


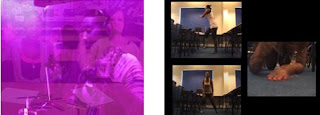
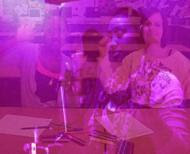
Another example of an element to our music video that our audience appreciated was the effects used in our music video, particularly focusing on the use of opacity with the shots used in the recording studio- showing the sound levels and main singer recording. The audience found these effects ‘interesting’ as it helped to act as a transition between different shots and also didn’t focus just on what shot, there was more for the audience to look at.


Evaluation: What have you learned from your audience feeback? Pt 1

To improve my media product of a music video I organised an audience feedback session, inviting members of our target audience which features teenagers from the ages of 14 to 18. We decided to invite this age range as the feedback would be the most effective as they are part of our target audience that we are trying to appeal to. Audience Feedback was given through what worked effectively with our Music Video (WWW) and what could we improve on in our Music Video (EBI). I felt the session was extremely useful to us as a production team as we heard directly from a part of our target audience what they felt attracted to and what they felt need more of or didn’t necessarily work.

Saturday 10 April 2010

Evaluation: How effective is the combination of your main product and ancillary task? Pt 4

I also combined the jig-saw idea at the end of the music video to my ancillary task which draws another direct link between the two.


I feel that my combination between my main product and my ancillary task is a strong connection due to the representation of the band. The idea of ‘madness’ is seen in the music video which is also seen in my ancillary tasks in particular in the inside cover of my DVD, as the inside cover is packed with images, different colours and different stamp patterns, which is extremely eye catching and creates a ‘mad’ persona to the product.


Evaluation: How effective is the combination of your main product and ancillary task? Pt 3

I feel another way I have effectively combined the two tasks is through the themes that are seen in the music video. I combined iconography from the music video featuring chequered squares and used them throughout the whole of my ancillary task. The conventional element of Ska was modernised with the use of colour placed on the chequered squares and a greater amount of squares.


Evaluation: How effective is the combination of your main product and ancillary task? Pt 2

Throughout the main product there is limited amount of performing in the video suggesting that the band are more focused on the image of the band rather than music. I wanted to emphasise this with my ancillary tasks but also show that music is also apart of the band.


Evaluation: How effective is the combination of your main product and ancillary task? Pt 1

The representation of the band is carried out through the Digi-Pack that features a music video and my ancillary tasks. Iconography can be used to combine the two but overall the combination can be complex to achieve. My most effective link between the music video and ancillary task is the use of colour. As the main product has challenged the conventions of Ska through the use of colour- I have done the same throughout my ancillary task. I have used bright colours in my ancillary task that are seen in the main product.


Wednesday 31 March 2010

Evaluation: In what ways does your media product use, develop or challenge forms and conventions of real media products? Pt 6

After analysing the genetic conventions I then continued to analyse a number of CD covers in the genre of 2Tone Ska, including ‘The Specials’, ‘The Selector’ and also a Ska compilation album. From textually analysing these covers I recognised the conventions of the genre- the colours of black and white were used, chequered squares were dominate and a clear convention in all covers and the use of silhouettes were a common convention of the genre. The fonts on all covers were bold and extremely eye catching from the audience.


The 2Tone Ska conventions I followed for my DVD cover included the use of silhouettes- I took a photo of the band and change the colour overlay one to white and the other to black to use the convention of black and white as well. Another convention I used from the genre included the use of chequered squares however I decided to develop this convention by adding colour to the convention and developing it for a modern female audience in the age range of (14 to 18). The font I used was bold and eye catching like the genre of Ska but I decided to develop this further with bright colours appealing to my audience. My main idea to develop the conventions of the genre was the use of colour in my DVD cover. I then applied the ideas from my DVD cover to my magazine advert for the marketing of the product.

Here you can see the font and colours mentioned above -

Friday 26 March 2010

Evaluation: In what ways does your media product use, develop or challenge forms and conventions of real media products? Pt 5

Before the creation of my ancillary tasks, I researched into the genetic conventions of album covers and magazine adverts for the marketing of the album. I analysed the conventions of a mainstream artists album cover which was ‘Jay-Zs’. From this research I was made aware of the common genetic conventions of a CD cover and back cover. These included the artists/bands album, album title, track-listings, barcode, record labels logo, format, copyright details and website addresses. I successfully followed the forms and conventions of a CD cover in this aspect.


Tuesday 23 March 2010

Evaluation: In what ways does your media product use, develop or challenge forms and conventions of real media products? Pt 4

Another factor that shows my media product challenging the conventions of the Ska genre in the music video is the performance factor. We have the band performing in the music video but not as often as you would conventionally see it in bands belonging to the Ska genre. Although the band is present with close ups of the bands instruments and performing- which is a common in the genre, we haven’t embraced this and used it totally throughout our music video. We were focusing on matching the lyrics with footage to create a sense of narrative and humour for the audience. We decided to give our audience more by animating the lyrics with live action that would illustrate what the lyrics say. To break the conventions further we used stop motion animation which hasn’t been used before in the genre of Ska.

Furthermore, I followed 2Tone Ska’s forms and conventions throughout my media product through the use of chequered squares and also split screens throughout my music video. I wanted to start a new movement of genre, re-inventing genres for a modern audience.

Monday 22 March 2010

Evaluation: In what ways does your media product use, develop or challenge forms and conventions of real media products? Pt 3

An extremely strong way that my media product challenges the conventions of the Ska genre is the image presented of my band. Ska is a male dominant genre with very little females present in the genre, so we wanted to break the conventions of 2Tone Ska and use an all female band. Influence came from ‘The Selector’, as band that features a main female vocalist as while as the Ska-Pop band that brought Ska to a modern audience in the 1990’s, ‘No Doubt’ which features a female main vocalist too. Creating an all female Ska band would modernise the genre completely and directly break the conventions of the male originated genre. As we are breaking the conventions with female members, I used elements that would complement the changing of gender for example the use of bright colours such as pink, purple and yellow featured in my music video as well as in my ancillary tasks.


Furthermore, in my ancillary task I had symbols of hearts and stars amongst other feminine elements that would challenge the genre of Ska, as these elements would have never been related to the genre. I am re-inventing the genre for a modern audience, developing the genre from a niche market to a more mass market. Taking direct personal inspiration for the indie pop girl band ‘The Veronicas’ .


Sunday 21 March 2010

Evaluation: In what ways does your media product use, develop or challenge forms and conventions of real media products? Pt 2

There are various ways my media products use, develop and challenge forms and conventions of real media products. I wanted to create a media product that develops and challenges the conventions of the Ska genre, modernising and re-inventing the genre for a current, contemporary audience. The main way I did this was through the use of colour, I challenged the conventions of Ska by moving away from the conventional black and white throughout the whole promotional package and replaced it with bright colours. Although black and white is still present in my media products, the eye catching bright colours dominant, emphasise the progression of the genre, moving the genre into pop -collaborating conventions of two genres.


Evaluation: In what ways does your media product use, develop or challenge forms and conventions of real media products? Pt1

Music Videos are a successful way of promoting music acts, marketing their image, sound and appeal to the audience. Music Videos are a strong way to focus on the representation of an artist or band. Along with Music Videos promotional products used to market acts and complete a marketing package include album covers, posters and other forms of merchandise. As part of my Preliminary task I created a Music Video, I also created a front and back cover to a DVD album, the inside cover to the album, a promotional magazine advert marketing the release of the album alongside other extra marketing materials - making up my Ancillary task.

Drawing from my audience research I decided to produce a Music Video with the chosen genre of Ska, with the sub genre of 2Tone. I created a Music Video in a group to the song ‘Baggy Trousers’ by Madness. Before the creation of my Music Video I undertook countless amount of research into the conventions of a Music Video. I analysed low budget Music Video to get a feel for what I could be producing with no budget behind my Music Video. I then researched into the common conventions of editing types that I might follow throughout my Music Video- Carol Vernallis Theory of the Kindest Cut, which is an argument into pop music videos relating to continuity and montage editing. I was then made aware of Bordwells and Thompson’s Theory with is applied to Music Videos, I researched into the four categories of the film editing which were Graphic, Rhythmic, Spatial and Temporal. Using these theories I analysed a Music Video by Radiohead “Rabbit In Your Headlights”. From this research I was made aware of the conventions of editing a Music Video that I would follow and challenge when producing my Music Video.

My music video follows form and conventions of a real media product- a music video in various ways. My media product conforms to the conventions of Bordwell’s and Thompson’s idea of Rhythmic editing. The editing of my music video matches the pace and tempo of the music used. Another form and convention that my product follows from a music video is the use of shots matching the lyrics of the music video- Illustration. I have achieved this however I did not create a set narrative throughout my music video, as I believe my audience would get ‘bored’ or uninterested in the video if we decided to create a set narrative to follow.

Another approach to my research into Music Video, I had to understand the forms and conventions of a Music Video’s as a media product. Before choosing my genre of music to produce a Music Video on, from my audience research I was made aware the three most popular genres of music amongst the audience who completed my questionnaire. I then analysed Music Videos from the genres of pop, rock and indie, to become aware of the conventions of these genres. I did the same analysis but into Ska Music Video’s so I was aware of the conventions I could use, develop and challenge with my music video.

See Research and Planning section of blog for evidence.

Tuesday 16 March 2010

Filming

In today’s recording session I filmed Sheriece and Stacey using two cameras and set them up in two different positions. One was set up in front of them- mid shot and the other was a high angle shot with a slight over the shoulder. We remembered to burn the track on a CD so that Sheriece and Stacey could sing at the same time and pace of the track. We also used a studio light as it improved the lighting and overall presentation of the filming. We filmed in a classroom as it related to the lyrics of the song and the audience would recognize that we were in a school- with the tables and chairs in row along with computers in the background.

We decided to set the shots up so that Sheriece and Stacey (the band members) would be sitting at a desk, acting like there were doing work and then directly singing to the camera with energetic and happy facial expressions- performing to the audience and engaging them.

Drawing again on our stop motion ideas, we filmed a stop motion sequence that we would use in our music video- it was a mid shot of a piece of paper on a desk with writing on it- relating to the lyrics and band.

Thursday 11 March 2010

Filming

Today we filmed a section to use to improve our video and wanted to focus mainly on the mise-en-scene. We went to a science classroom that had posters, diagrams on the wall and other elements. This was important as the audience would create a link between the music video and mise-en-scene of a classroom, as well as the lyrics relating to the mise-en-scene.

The shots we filmed today were mid shots and close ups of the main singer of the band singing the song, we also filmed an empty classroom with a pan shot. To finish this recording session we decided to experiment more with the stop motion used in our music video- so we filmed a white board with the words ‘Baggy Trousers’ on it and will edit it in a stop motion style.

Tuesday 9 March 2010

Audience Feedback

To improve our music video we carried out an audience feedback session, which included constructive criticism to help us improve our media product. We invited audience members who weren't media students and some were a part of our target audience to fully gain benefits from this session of feedback.

Filming

When speaking about re-shooting we decided to film in the schools film club, so for this session we filmed a groups of students in film club who were wearing school uniform. We decided to set the classroom up as a generic classroom would be set up- re-arranging the chairs and tables into lines. So the audience would be able to recognise that the location was a traditional classroom.

We spoke to the students involved in filming at the time and told them what we wanted to achieve- them sitting in the room at desks. We filmed them sitting in one location and then got them to move to another location and so on. So when we come to edit this we would use stop motion so it would look like the students moving seats without seeing them actually do so.

The camera was set up in a high angle on a table with a long shot so the whole location could be seen in the shots. We also used a studio light to improve the lighting used in this sequence. Once we achieved what we wanted we then filmed another sequence.
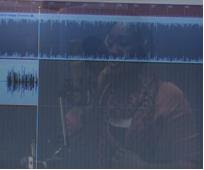
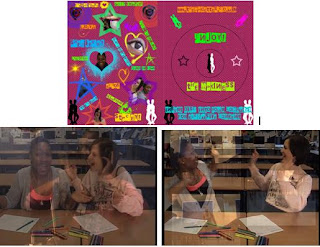
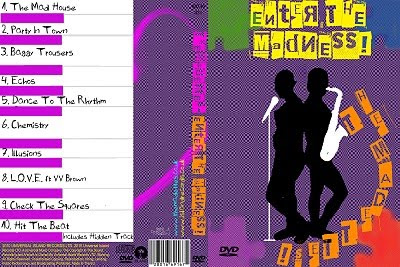
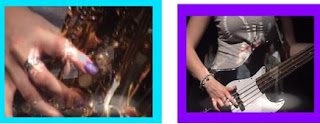
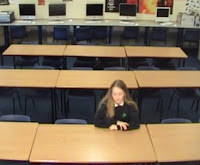
From the same angle and shot type we filmed the students sitting down at the desks and introduced Sheriece and Stacey into the sequence. So they would appear with them and also showing them messing around and being ‘mad’ relating to our bands representation, as we needed to make this clearer which we were made aware from by are audience feedback.

Friday 19 February 2010

Uploading footage

After recording in the music studio we uploaded the footage to the Macs, after the uploading we were made aware that the lighting helped and was extremely effective in the close up shots of the main singer. However, after watching the footage back the vocals were out of time as we didn't use the track while we were recording. To overcome this we are going to re-shoot in the recording studio again making sure we have the track on us.

Thursday 18 February 2010

Re-Shooting In The Recording Studio

After booking the recording studio, we re-shot focusing on improving the angles and shot types, the way the main singer is presented and also the lighting used in the video. To resolve the lighting problem we used a studio light from the photography department in our school.

Drawing on the Mise-en-scene used in today’s shooting, we used a microphone, the microphone stand, headphones- following the professional theme in a music studio we also made sure the background was appropriate. We took two shots- a mid shot of the main singer with a blue board in the background and then a close up of the main singer’s face with a purple background with the sound absorbers in the background.

We also thought about making the main singer look more fun and interacting with the audience- so the main singer did simple gestures pointing to the camera and smiling more to the camera.

Wednesday 17 February 2010

Planning to Reshoot

During today’s lesson we discussed in our groups what re-shooting we were planning to do to improve our music video as a whole. While watching our music video back, we were made aware that various shots in the recording studio weren’t as effective as they could have been- due to the lighting used and also angles of the camera. We also didn’t feel that the main singer looked like a conventional ‘popstar’ in a music video and we needed more shots of the main singer performing to the audience- involving them.

Another factor to our music video that we were made aware of was the effectiveness of the stop motion used in the first verse and we felt we could use this throughout the whole of our video- footage matching the lyrics in the songs.

In the forthcoming weeks, we are planning as a group to re-shoot in the recording studio and also to shoot in our school’s Film Club, filming younger students in the classroom with our band members also present but through the use of stop-motion animation.

Re-Shooting Schedule

Wednesday 3 February 2010

Revisiting Our Music Video- Editing

After finishing all of our ancillary tasks, we revisited our music video again. We needed to make sure that all of our materials from the ancillary task fitted well with the Music Video as a whole promotional package. The use of colour in our music video used with colour contrasts creates a theme used in my ancillary tasks along with the jig-saw pieces.

As a group we decided that all of our individual ancillary tasks could have a greater connection with our music video. As we all used the thematic idea of checked squares in our ancillary tasks we decided to use a checked square transition on Final Cut- Checked Wipe that we would used recurring in our video.

Wednesday 27 January 2010

The Madettes! Merchandise Advert

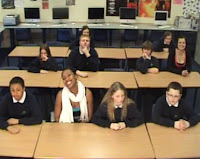
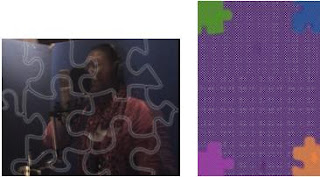
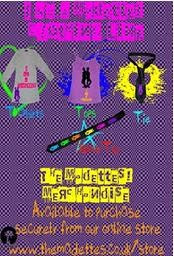
This is my final piece marketing material from my ancillary task, I have created another advert advertising merchandise for ‘The Madettes’ to be purchased. I have taken various photos to then be uploaded and edited in Photoshop, I took photos of my Ipod socks, one big badge, key rings, purse and bags. This again is appealing to my chosen target audience as these accessories and different forms of merchandise prove popular amongst them. During the editing stages of these photos I used colour overlay on the products, placed a brand name or title over the products and used the recognisable silhouette on the products.

I have kept the same conventions I have used for my other adverts for further merchandise for ‘The Madettes’. I have placed the title, name of the products, photos of the product and where you can purchase the product from. The same font and background is used making my entire promotional materials one big marketing brand.

Tuesday 26 January 2010

I Am A Madette! Make-Up Range Merchandise Advert

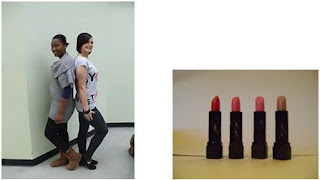
I decided to branch out with the ‘I Am A Madette!’ brand and product a make-up range for my audience. I know that this would be successful as it appeals directly to my target audience- they wear make-up and having a make-up product by a girl-band will make them ‘edgy’ and ‘original’. I have uploaded my make-up range advert much like the other posters I went through the same process. I took photos of lipstick, lip-gloss, and a jewellery box that I would sell as a make-up box and other make-up products used in my gift set. I used the magic wand tool on Photoshop to edit out the white background on these pictures, so I would just have the product on its own. I then placed a variety of different coloured silhouettes of my band members on them- which would make them more sellable.

I have kept the same conventions I have used for my other adverts for the ‘I Am A Madette!’ brand. I have placed the name of the make-up range, photos of the product and where you can purchase the product from. The same font and background is used making my entire promotional materials one big marketing brand.

I Am A Madette! Jewellery Range Merchandise Advert

To continue the ‘I Am A Madette!’ brand for my band, I have decided to produce a jewellery range for my target audience. This is an uploading of my band’s jewellery range advert. I took photos of earrings, a necklace and a jewellery box- I then uploaded them onto the computer and edited the photos in Photoshop. I used my bands logo of the black and white silhouettes to create the earrings- I used the ‘magic wand tool’ to delete the charm on my original photo of the earrings and kept the top piece of the earring. I then placed the silhouettes under the piece of earring I had left to create this product. I placed a black silhouette of ‘The Madettes’ on the photo of the box and wrote the brand title as well. Finally, for my necklace I wanted to use the jig-saw theme I have in my Digi-Pack, so I copied the rig-saw pieces from my front cover and then placed silhouettes on top of them. I edited the photo of the necklace much like the earrings by deleting the charm and keeping the chain.

I have kept the same conventions that I have used on my other promotional material for my band to make it identifiable and as one whole marketing package. I have placed the name of jewellery range, photos of the product and where you can purchase the product from.

Monday 25 January 2010

I Am A Madette! Clothing Line Merchandise Advert

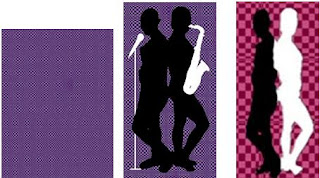
This is an uploading of my band’s clothing line ‘I Am A Madettes!’ advert for my bands merchandise. I took photos of clothing items including a white t-shirt, purple top, tie and skinny tie- I then uploaded them to the computer and edited them on Photoshop. I decided to create the clothing line ‘I Am A Madettes’ as I feel my target audience would aspire to be like ‘A Madette’ and this is one way they can feel part of ‘The Madettes’. I have placed the bands identifiable logo on the items of clothing to make it identifiable for my fans and more personal for the aspiring member of the audience.

I have kept the same conventions that I have used on my other promotional material for my band to make it identifiable and as one whole marketing package. Many pop/rock girl bands have merchandise like these items I have decided to create. I have placed the name of the clothing line, photos of the product and where you can purchase the product from. I will also create other merchandising materials for my target audience as this kind of marketing works with the promotion of my band and audience overall.

Friday 22 January 2010

The Madettes Tour Advert

Along with my Digit-Pack of a DVD cover and Album advert I have decided to produce other marketing materials to include in my marketing package as a whole. I have produced extra marketing materials for my band as it is another effective way of promoting my band as a whole and my bands products. All my marketing material appeals to my target audience and the merchandise behind my promotion is visually attractive to my target audience. I have used my theme of checked squares and purple background throughout the promotion materials along with the same font bringing together the whole of my music package. The music package also includes all necessary conventions for example the bands name, details of all the products and where you can purchase them, event details, record label and similar iconography throughout.

As advertised on my album promotional advert I have included information about a promotional tour that my band ‘The Madettes’ will be doing a couple of months after the release of their debut album (which is quite common amongst artist/bands), so I decided to produce a tour poster. I have again stuck with my conventions I have used on all other material and also show the conventions to a tour poster which include- the tour dates, venues my band will be performing in, venues box-office phone numbers, how to buy the tickets, title of tour, band name and website.

I researched music venues carefully as I wanted my band to perform in the right venues, appealing to the right away. The type of venues that I have decided to chose are venues that our popular amongst the student demographic- part of my audience that this band will appeal to. I have decided to get my band to perform in smaller venues as this is their first mainstream tour and most artists/bands start off with small venues.

I have kept the similar visual style to my tour advert as I have in my other products to make an effective overall marketing package, which will appeal and will be recognise by my audience.

Wednesday 13 January 2010

The Madettes DVD Disc Label

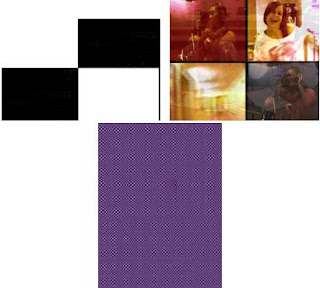
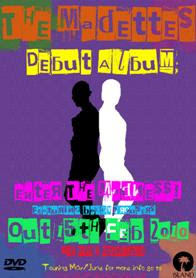
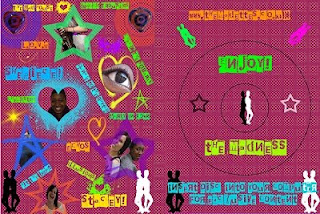
Along with my DVD cover and inside cover I have produced a DVD label that would be mounted onto the DVD in the production stages of making the DVD. This DVD label stemmed from ideas during the planning stages of my inside cover. I took two pictures of close ups of Sheriece and Stacey and then added a colour overlay on both- black and white the conventional colours of the Ska genre. I then downloaded an appropriate heart vector/brush from the Internet available in the public domain, I chose black and white again but used them on the contrasting colours of the band members. I kept the same background that I used on the DVD cover and inside covers. I placed my record label and DVD symbols onto the DVD label along with the copyright information in a different colour as it would stand out in contrast to my background, as this is a convention of a DVD disc. I have used the font and colour of the font throughout my Digi-pack so to keep to the theme of my Digi-pack I decided to use it on the DVD disc label too.

Tuesday 12 January 2010

Photos taken to be used on my DVD disc label


During today's lesson I decided to create extra material to the task set, I decided to produce a DVD Disc label that would be mounted onto my DVD in the production stages of making the product. I wanted to include my bands members on the disc- I took a variety of shots of the members long shots face on, mid shots face on and then close ups side on. After uploading these photos I decided the most appealing photos that would work with my intentions would be the close ups side on photos (above). I followed my plan for this and directed Sheriece and Stacey to stick their tongues out- so when I create the Disc label it will look like they are sticking their tongues out at each other. I wanted to show that the band doesn't take itself too seriously and knows how to have fun, trying to convey the 'mad' feel to the image of the band.

Friday 8 January 2010

The Madettes DVD Advert- Creating my magazine DVD advert- Photoshop


In today's session I created a magazine advert advertising my DVD, I kept the same background I have used for my DVD front and back cover so I copied the layer over to a new canvas that was the size of an A4 piece of paper. I then used the stamp tool and placed the rig-saw pieces in the corner of the advert, I then went over the jig-saw pieces with different colours using the brushes. I wanted to keep this theme throughout my Digi-Pack. For the main image of my band on the magazine advert I decided to use the same silhouette I used on the front cover from my DVD (relating and drawing a link between the two) but changed half the silhouette to black and the other to white- showing the Ska genre as it is a convention of the genre.

After creating the background and silhouettes to the advert, I then started to include the conventional information and symbols that needed to be on the advert. I placed my record label logo on the bottom right hand side and a DVD logo on the left. I kept the same font as on my DVD cover and included the bands name and title of the DVD. I also included additional information that would be needed such as the release date of the DVD, release formats and websites. To make the advert more appealing to the audience I included information about the lead single being on it and also that it is the bands debut release. I have also included details about a promotional tour that 'The Madettes' would be doing after the release of their album.


The Madettes DVD Inside Cover- Photoshop


This is my finished DVD inside cover. I have decided to draw on the element of rewarding the audience- giving them something when they open the DVD and I feel this inside cover achieves this. For the background of my inside cover I have decided to keep the checked squares effect that I achieved from using the stamp tool- however, I wanted to change the colour of the back ground from purple to pink as I wanted the audience to have something visually different to see but it is still familiar.

For my right side of the inside cover I have drew where the DVD would be presented in the centre, I have used the silhouettes as iconography for the band so the audience would recognize the symbol to the band. I then used the stamp tool to place two stars on the outline of where the DVD would be- one white and black linking to my Ska genre. I have used the same font but changed the colour so it is readable and communicates a modern Ska genre of my target audience.

For the left side of the inside cover, I have gone for the 'busy' and 'in your face' effect drawing on the surprise effect when you open the DVD. I have taken screen shots from the bands debut music video of 'Baggy Trousers' and then taken pictures of my band members- close ups and mid shots. I have placed brushes I downloaded that our copyright free and placed them behind my photos and screen shots to make them stand out to the audience. The colours again are bright and neon as I want to modernize the genre as a whole. To fill the space on the left side I used more brushes to make sure I used the 'busy' effect on the whole left cover. I then wrote the titles of the songs in text boxes, finally I placed the band members names next to the photos of them- to introduce the audience to them individually.

The Madettes DVD Cover- Finished Front and Back cover


This is my final DVD cover, back cover and spine for the release of 'The Madettes- Enter The Madness!' DVD album. I decided to change and develop my draft 1 of the DVD album as I felt the back cover was a little too busy and I want to create the 'busy' effect when the audience open the DVD. I deleted the heart photo and silhouette on the back cover of the DVD and changed the piano I create and track-listings. I made the piano bigger so it was the main focus on the back cover and chose one colour which was pink instead of the pink and orange. I then decided to change the font colour and keys/notes on the piano- black to pink. I then inserted a light grey line so the notes looked separate and individual notes. Finally, to the back I decided to use a brush of a heart with a pink colour to it- I made it look like it was coming out of the piano and moved the layer under the piano.

The change I made to the front cover was on the bottom right corner- I changed the colour of the jig-saw stamp from light orange to red as I felt I needed a greater contrast to the colour of the title on the DVD cover which was orange.

I have developed my initial plan for the DVD cover and back cover when using Photoshop, as I did not use it before I learnt new techniques and developed my creativity along the way- which led me to develop my initial plan.

Tuesday 5 January 2010

The Madettes DVD Cover- Draft 1 of Front and Back cover- Photoshop

In this session I finished a draft of my DVD front and back cover. After creating a black silhouette on my front cover I used a downloadable brushes that were in the public domain to add final touches to my front cover. I downloaded musical instruments in the brushes set- I then used the 'Brush Tool' and chose the saxophone brush with a white tolerance of 50 and placed a couple over each other- so it produced a white silhouette of a sax. I then positioned the saxophone in the right place so my band's name looked like it was coming out of the sax. I then used the brush tool again and found a microphone brush- I changed the tolerance to 50 with a white colour to it- again looking like it was a silhouette of a mic. To create a mic stand I used the brush tool and used an appropriate size to create the stand. I then position the mic and stand together merging them and placing them next to Sheriece so it looked like she would be singing out of it.


To finish of my back cover I used the same silhouette of my band I used on the front cover by changed the colour overlay of it to a pink. I then wanted to make Sheriece a different colour so I Duplicated the layer and changed the colour overlay to orange. I then used the Eraser tool to rub out Stacey on this layer so final I got Sheriece in a orange silhouette and Stacey in a pink one together.